
Instant Sites and custom domains
Instant Sites is intended for static web deployments such as frontend builds, documentation sites, marketing pages, and other generated site output.
Cosine Cloud does not deploy site builds for you. Instant Sites deployments are created from the CLI with cos deploy. The dashboard manages project-level settings such as whether Instant Sites is enabled, which production subdomain the project uses, and which custom domain should follow production.
Use this when you want a project to have:
- a built-in Cosine production URL, such as
my-site.cosine.page - an optional custom production hostname, such as
app.example.com
Before you start
Section titled “Before you start”Make sure you have:
- a project already created in Cosine Cloud
- a static site build you can deploy with Instant Sites
- access to the Cloudflare account that manages the domain (optional, required for custom domains)
- permission to create a Cloudflare API token for that zone (optional)
If you have not deployed an Instant Site before, review the CLI flow first:
What gets configured
Section titled “What gets configured”Instant Sites uses two layers of naming:
- Production subdomain — the built-in Cosine URL for the project
- Production custom domain — your own hostname, configured through Cloudflare
The custom domain follows whichever deployment is currently promoted to production.
Steps 1 to 3 cover the standard Instant Sites setup. The custom domain flow after that is optional.
Step 1: Enable Instant Sites for the project
Section titled “Step 1: Enable Instant Sites for the project”- Open the project in Cosine Cloud.
- Go to Settings → Project Settings → Project.
- Open the Deployments tab.
- Turn on Enable Instant Sites.
This allows the project to receive Instant Sites deployments.
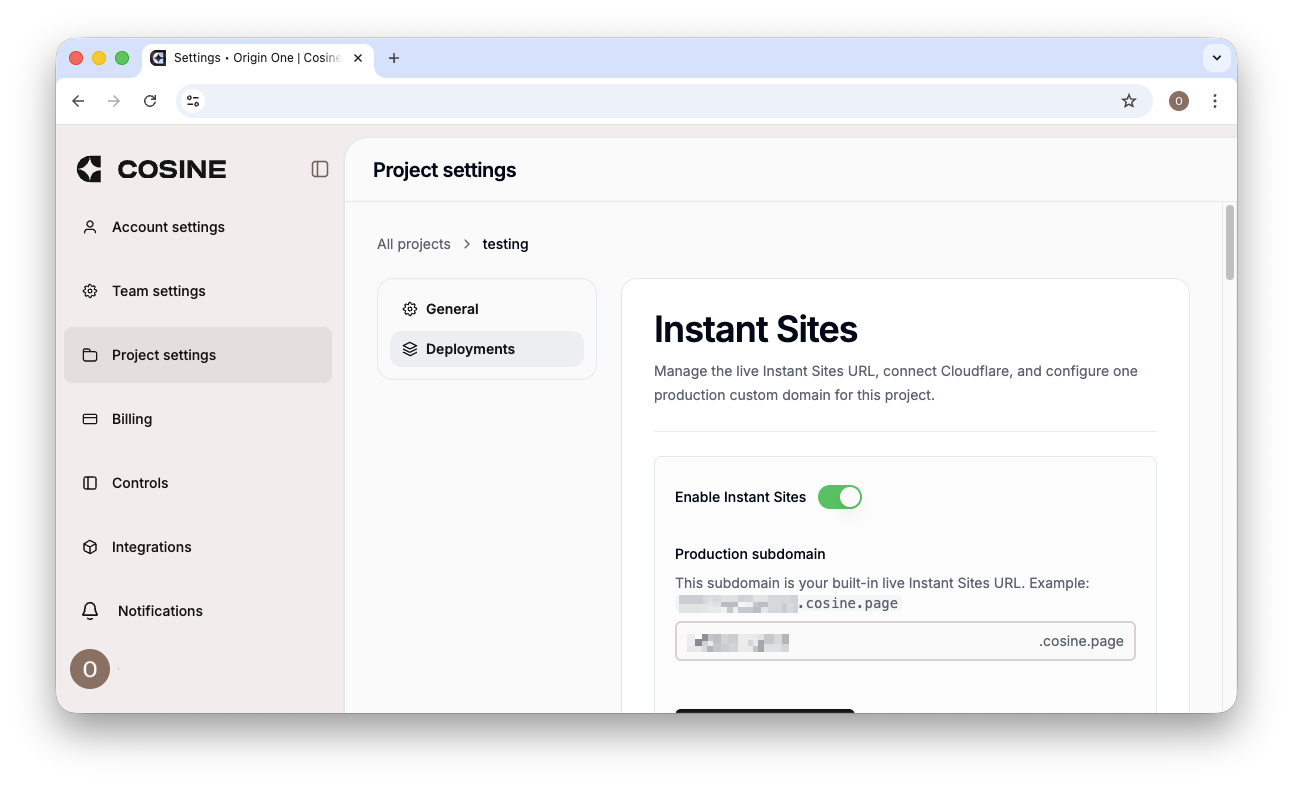
Step 2: Set the production subdomain
Section titled “Step 2: Set the production subdomain”Still in Settings → Project Settings → Project → Deployments:
- Find Production subdomain.
- Enter the subdomain you want Cosine to use.
- Save the change.
For example, if you enter docs-team, your built-in production URL becomes:
docs-team.cosine.pageUse this URL if you want a Cosine-managed production hostname without bringing your own domain.
Step 3: Deploy the site from the CLI
Section titled “Step 3: Deploy the site from the CLI”Deploy the built site from the CLI:
cos deploy distOr deploy and promote in one step:
cos deploy --promote distIf you want the deployment to become the project’s live production site, make sure it is promoted to production. The custom domain will only point at the deployment currently marked as production.
Optional: add a custom domain
Section titled “Optional: add a custom domain”You only need the rest of this guide if you want to use your own production hostname, such as app.example.com.
Step 4: Create a Cloudflare API token
Section titled “Step 4: Create a Cloudflare API token”In Cloudflare:
- Open My Profile → API Tokens.
- Create a token that has access to the zone you want to use.
- Grant at least:
- Zone: Read
- DNS: Edit or DNS: Write
- Restrict the token to the specific zone if possible.
- Copy the token value.
You only need to connect this token once per team in Cosine.
Step 5: Connect Cloudflare in Cosine
Section titled “Step 5: Connect Cloudflare in Cosine”Back in Cosine Cloud, in Settings → Project Settings → Project → Deployments:
- In the Custom domain section, paste the Cloudflare API token.
- Click Connect Cloudflare.
The Custom domain section in Cosine explains the flow directly:
- connect Cloudflare once for the team
- choose the production hostname for this project
- let Cosine create and validate the required DNS record in your Cloudflare zone
After the token is saved, Cosine can list the Cloudflare zones available to that token.
Step 6: Add the production custom domain
Section titled “Step 6: Add the production custom domain”Still in Settings → Project Settings → Project → Deployments:
- In Production custom domain, enter the full hostname you want to use in production, such as
app.example.com. - In Cloudflare zone, choose the parent zone that owns that hostname.
- For
app.example.com, chooseexample.com.
- For
- Decide whether to leave Use Cloudflare proxy (O2O) enabled.
- Leave it on if you want the hostname proxied through Cloudflare.
- Turn it off only if you specifically need DNS-only routing.
- Click Add custom domain or Update custom domain.
Cosine then asks Cloudflare to create or update the required CNAME and start hostname validation. This hostname will point to whichever deployment is currently promoted to production for this project.
Step 7: Wait for validation and SSL
Section titled “Step 7: Wait for validation and SSL”After saving the custom domain, watch the status fields in the same Deployments screen:
- Status shows the custom hostname validation state
- SSL status shows certificate provisioning progress
When validation completes, the domain becomes live and serves the deployment currently promoted to production.
How DNS should look
Section titled “How DNS should look”The Deployments UI shows a DNS target and expects the custom hostname to resolve to that target, for example:
cosine.pageIf Cosine has permission to manage the selected Cloudflare zone, it creates or updates this CNAME for you. If validation remains pending, check in Cloudflare that the hostname record exists and matches the target shown in the dashboard. If your domain is also on Cloudflare, leaving proxy enabled uses Cloudflare’s orange-to-orange routing.
Common mistakes
Section titled “Common mistakes”Choosing the wrong zone
Section titled “Choosing the wrong zone”Pick the parent zone, not the full hostname.
- Correct: choose
example.comforapp.example.com - Incorrect: try to find
app.example.comas its own zone
Using a token without the right permissions
Section titled “Using a token without the right permissions”If Cosine cannot list zones or update DNS, the token usually does not have the required permissions. Recreate it with zone read and DNS edit/write access.
Expecting the custom domain to follow preview deployments
Section titled “Expecting the custom domain to follow preview deployments”The custom domain follows the project’s production deployment, not every preview deployment. Promote the desired deployment first if the domain is still serving an older version.
Refresh or remove a domain
Section titled “Refresh or remove a domain”In Settings → Project Settings → Project → Deployments, you can also:
- click Refresh validation to ask Cloudflare to retry validation
- click Remove custom domain to remove the hostname from the project