
 @BatsouElef
 When most developers first try Cosine, they start with the web interface, and for good reason. It’s visual, intuitive, and integrates beautifully with GitHub, Linear, Jira, Vercel, and Slack. But if you’re a hard core developer and live in your terminal, you’ll be glad to know that Cosine also offers a powerful CLI that gives you full access to Genie without ever leaving your dev environment.
In this article, I’ll walk you through how to install and authenticate the Cosine CLI, what you can do with it, and when it might be the better choice over the web version.
Why Use the CLI?
Cosine’s CLI gives you all the power of our agentic AI engineer, but from your terminal. That means it writes/refactors/tests code, runs and executes shell commands on your behalf to build and iterate on your tasks. Whether you’re deep in a monorepo, spinning up tests, or working offline, the CLI makes it feel like Cosine is sitting right beside you.
Step 1: Install & Authenticate
You can find full installation instructions here, but here’s a quick guide:
- Install via npm:
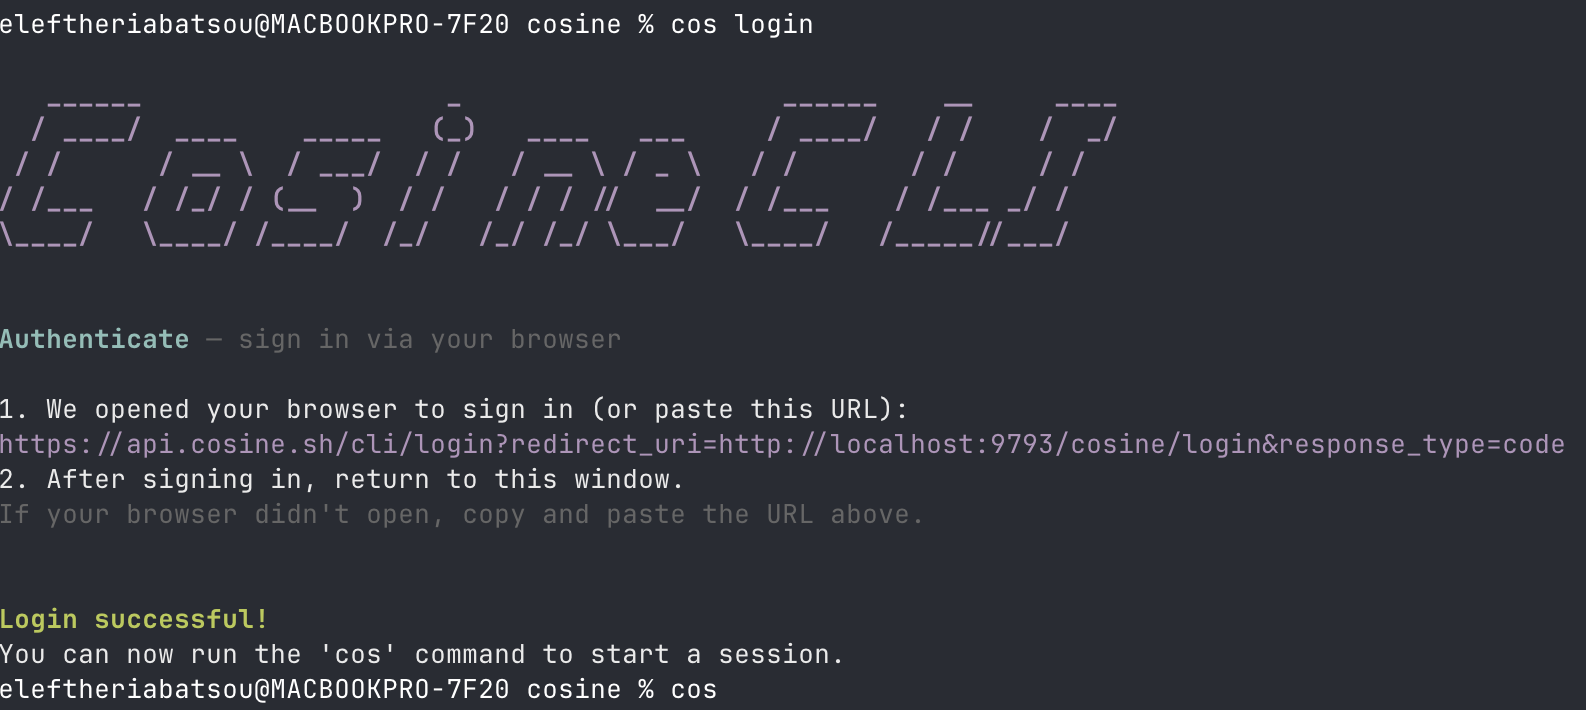
npm install -g cosine-cli - Log in with:
cos login - You’ll be redirected to authenticate via the browser. Once authenticated, the CLI will link to your Cosine account.
- Type
costo start
Step 2: Start a Session and Use the CLI Prompt
Once you’re authenticated, and you have run cos, the interactive CLI session will launch. This is your workspace to describe and manage tasks.
Inside the CLI UI, you’ll see:
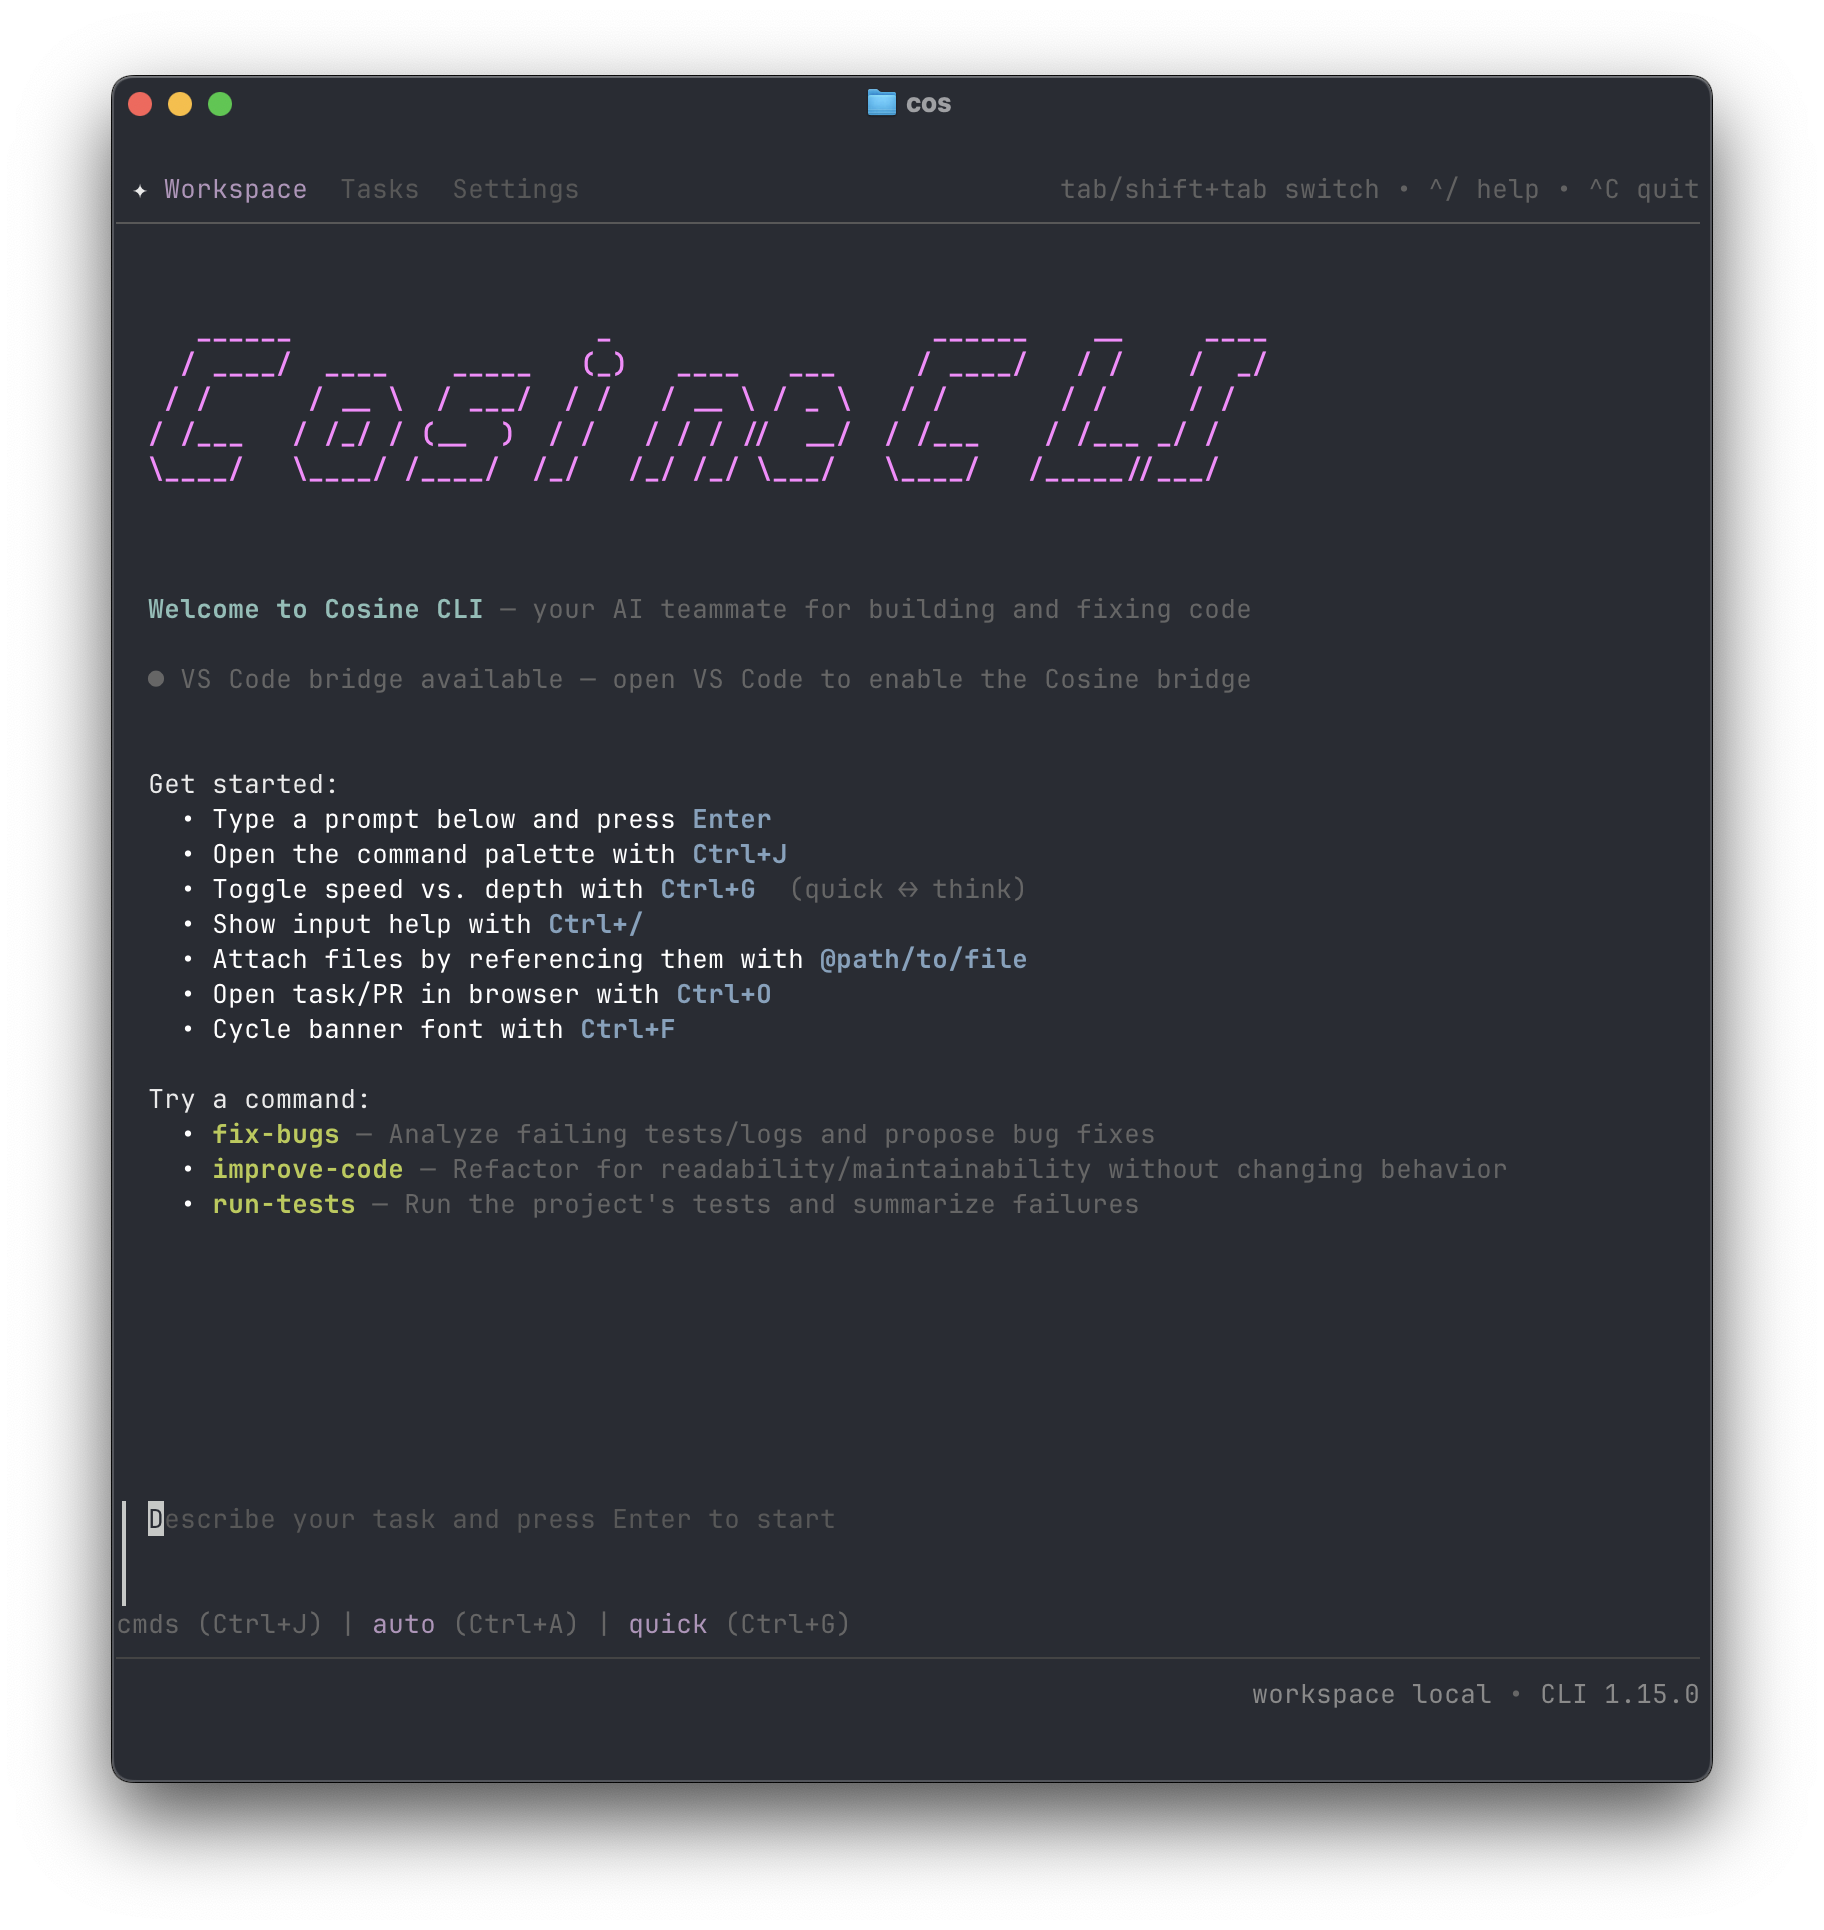
- A prompt to describe your task. Every time your task finishes, you can prompt again! (But you can also prompt without finishing a task, more about this below, in the ‘nudge’ paragraph.)
- You can open with Ctrl+J for command palette, and here is what you’ll find:
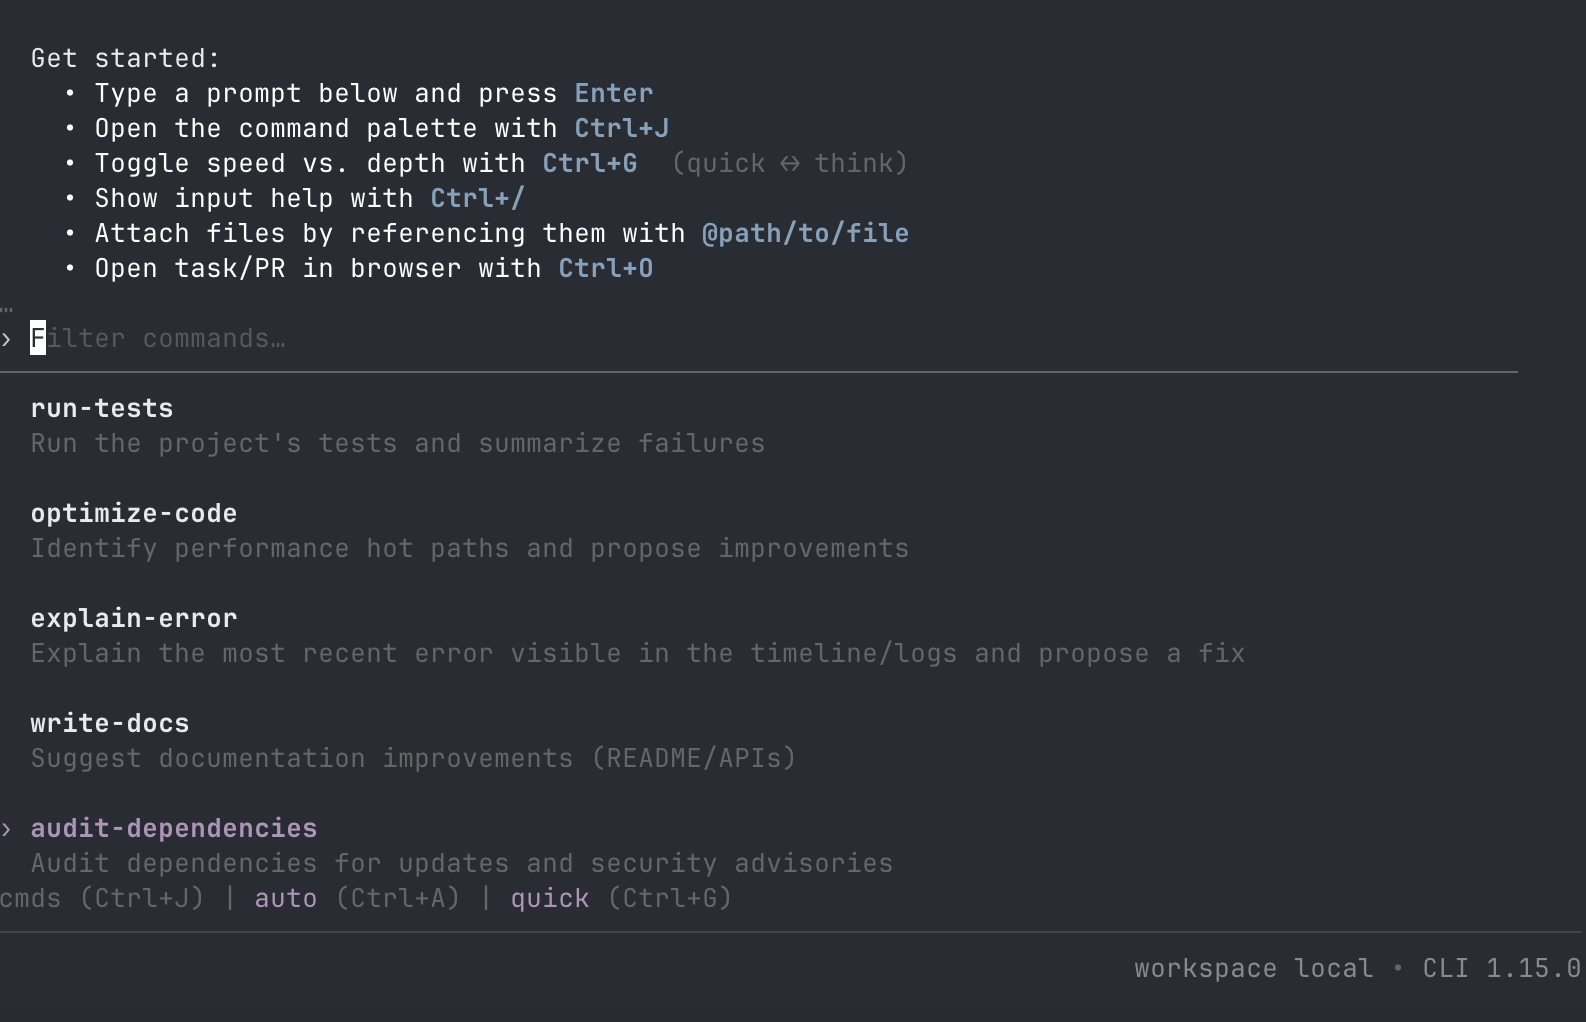
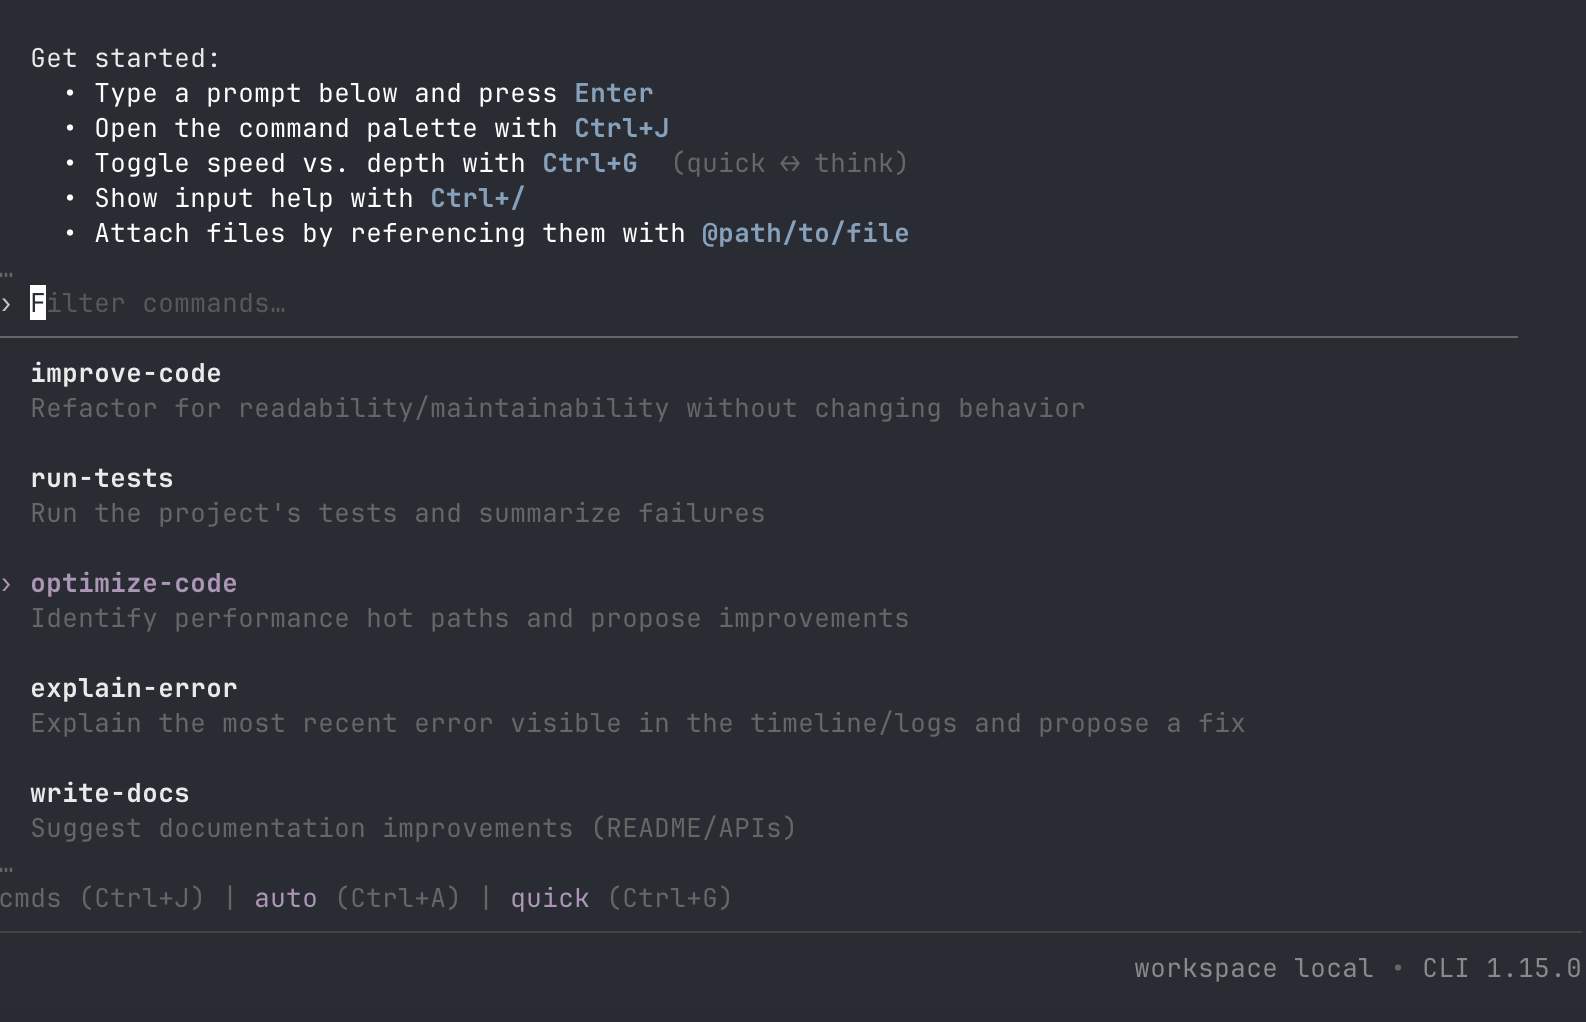
- Ctrl+/ means help
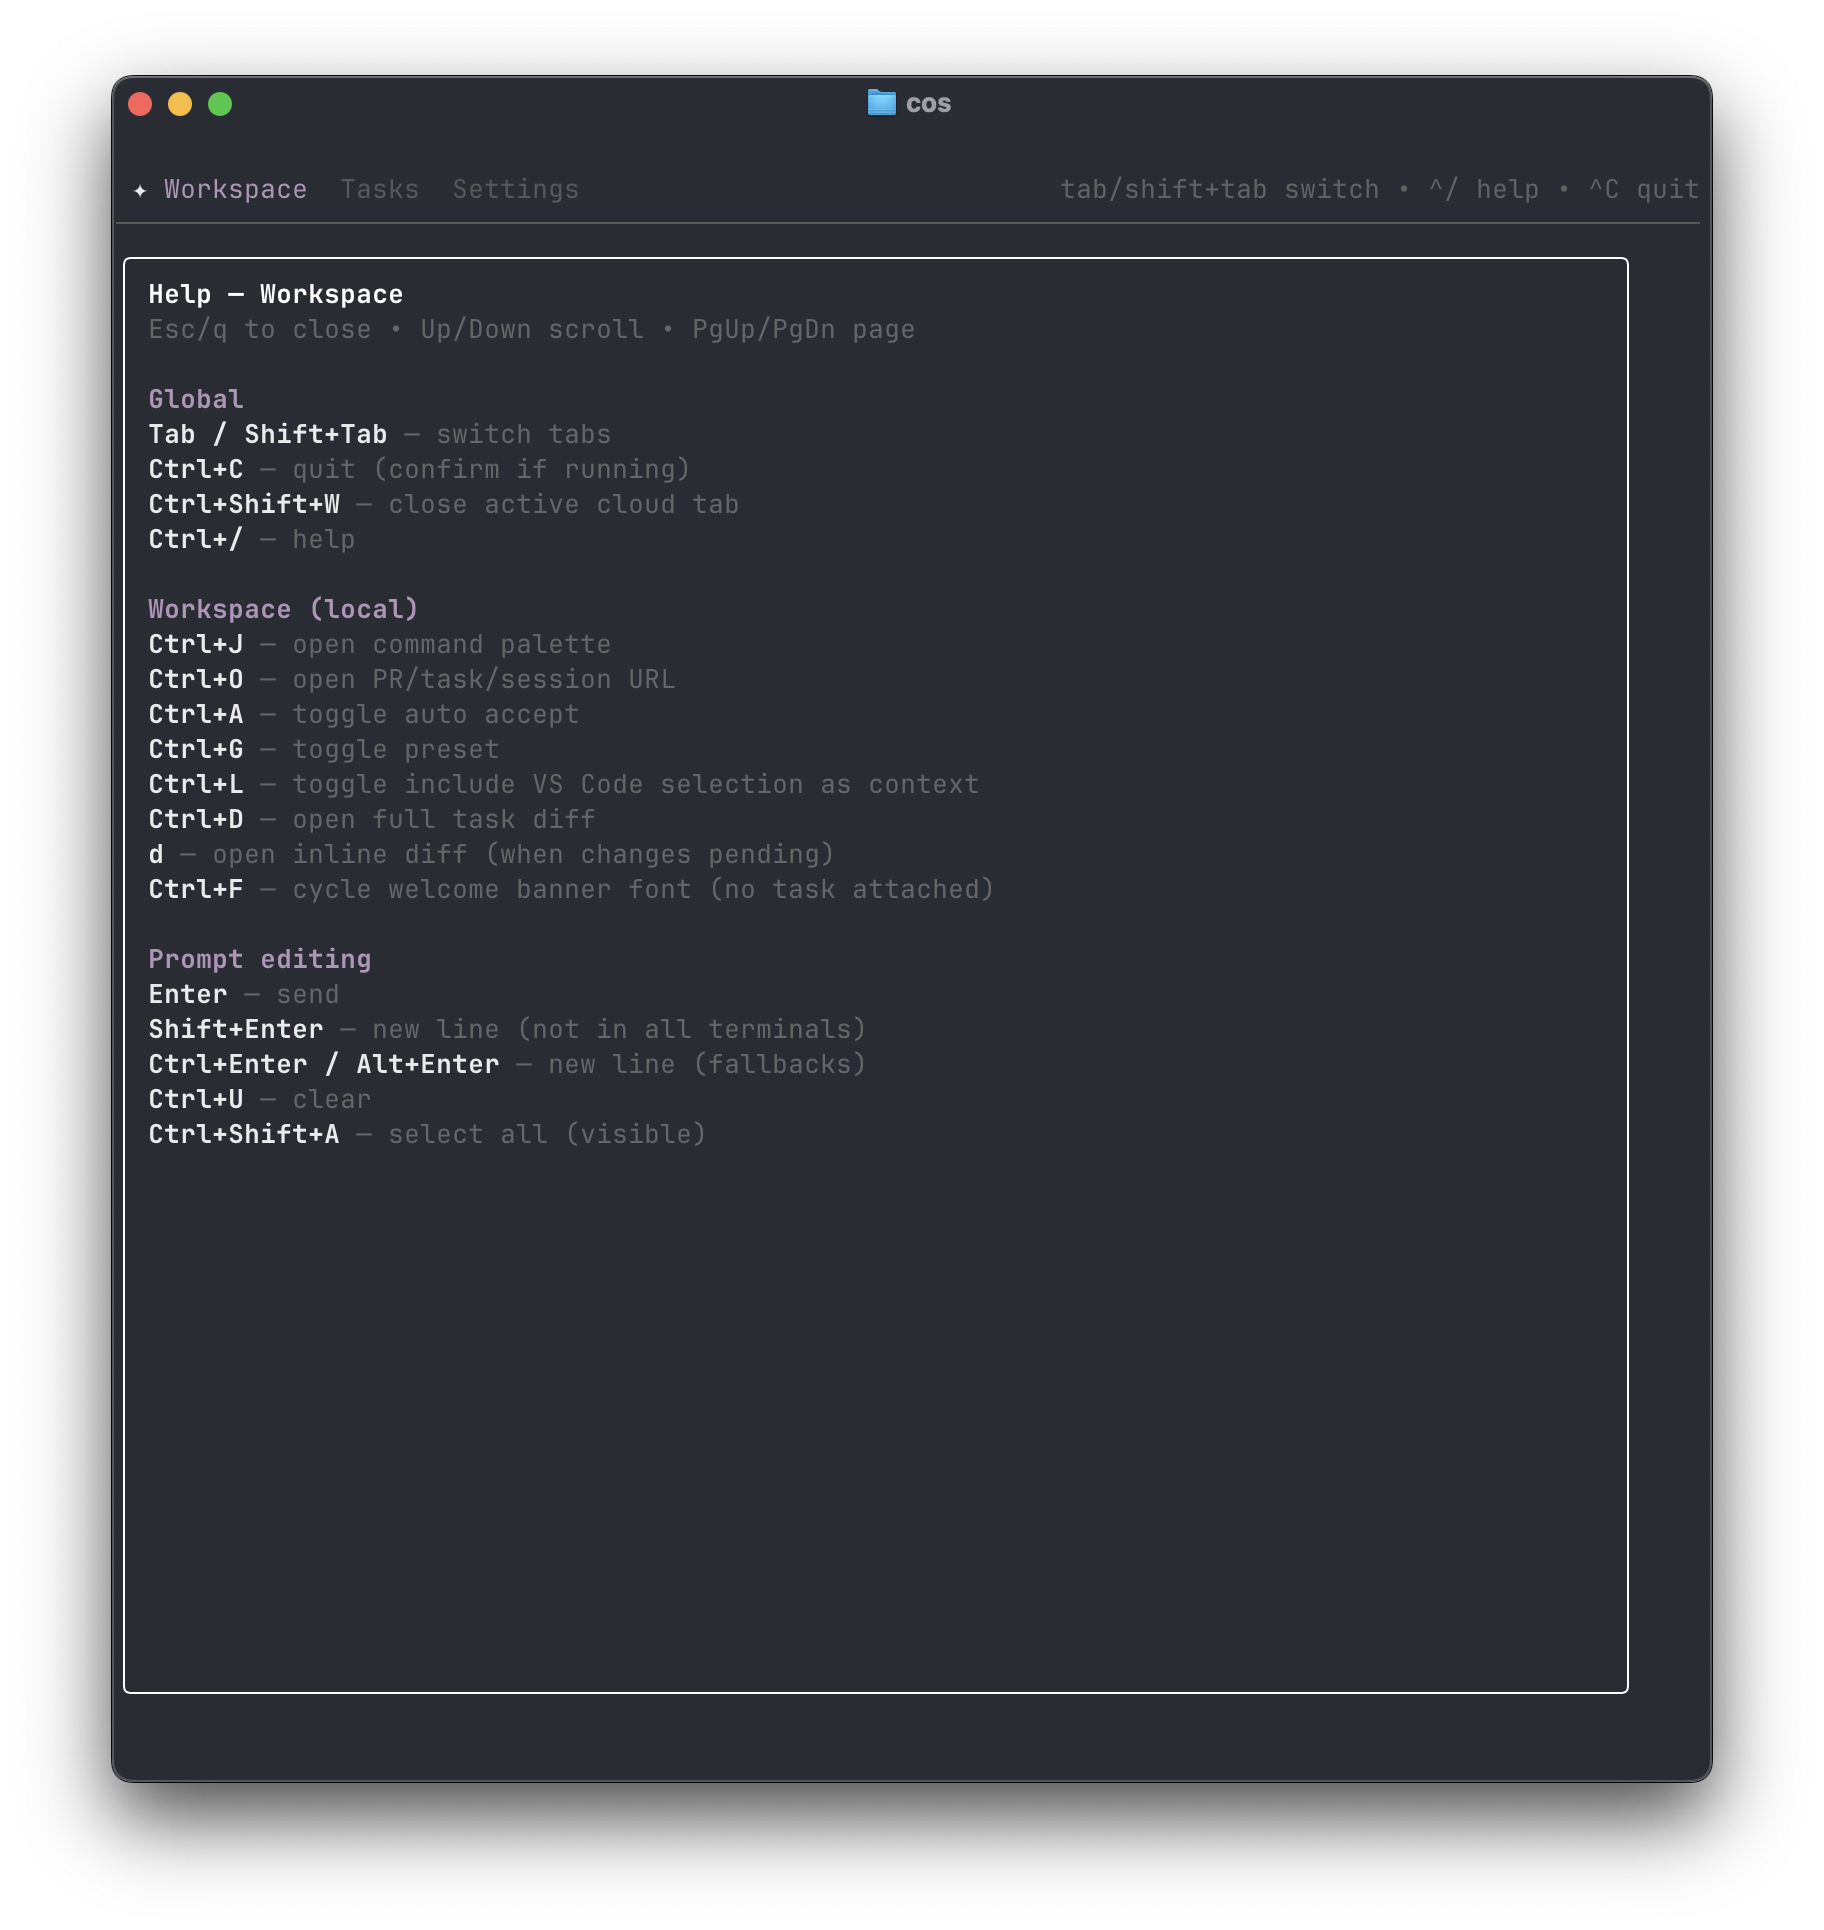
- Use @path/to/file to attach files, open a task/PR in the browser with Ctrl+0 and change fonts with Ctrl+F
You will also notice that below the prompt area, there are written a few more actions:

- Quick: quick vs think mode (and a new one is coming soon!). You can read more about the modes here.
- Auto: Toggle auto accept. If it’s on, automatically accepts all Genie’s changes.
Step 3: Create Your First Task
To create your first task you need to have a project, CD into it and let’s get started, in my example I’m going to prompt: “What does this project do?”
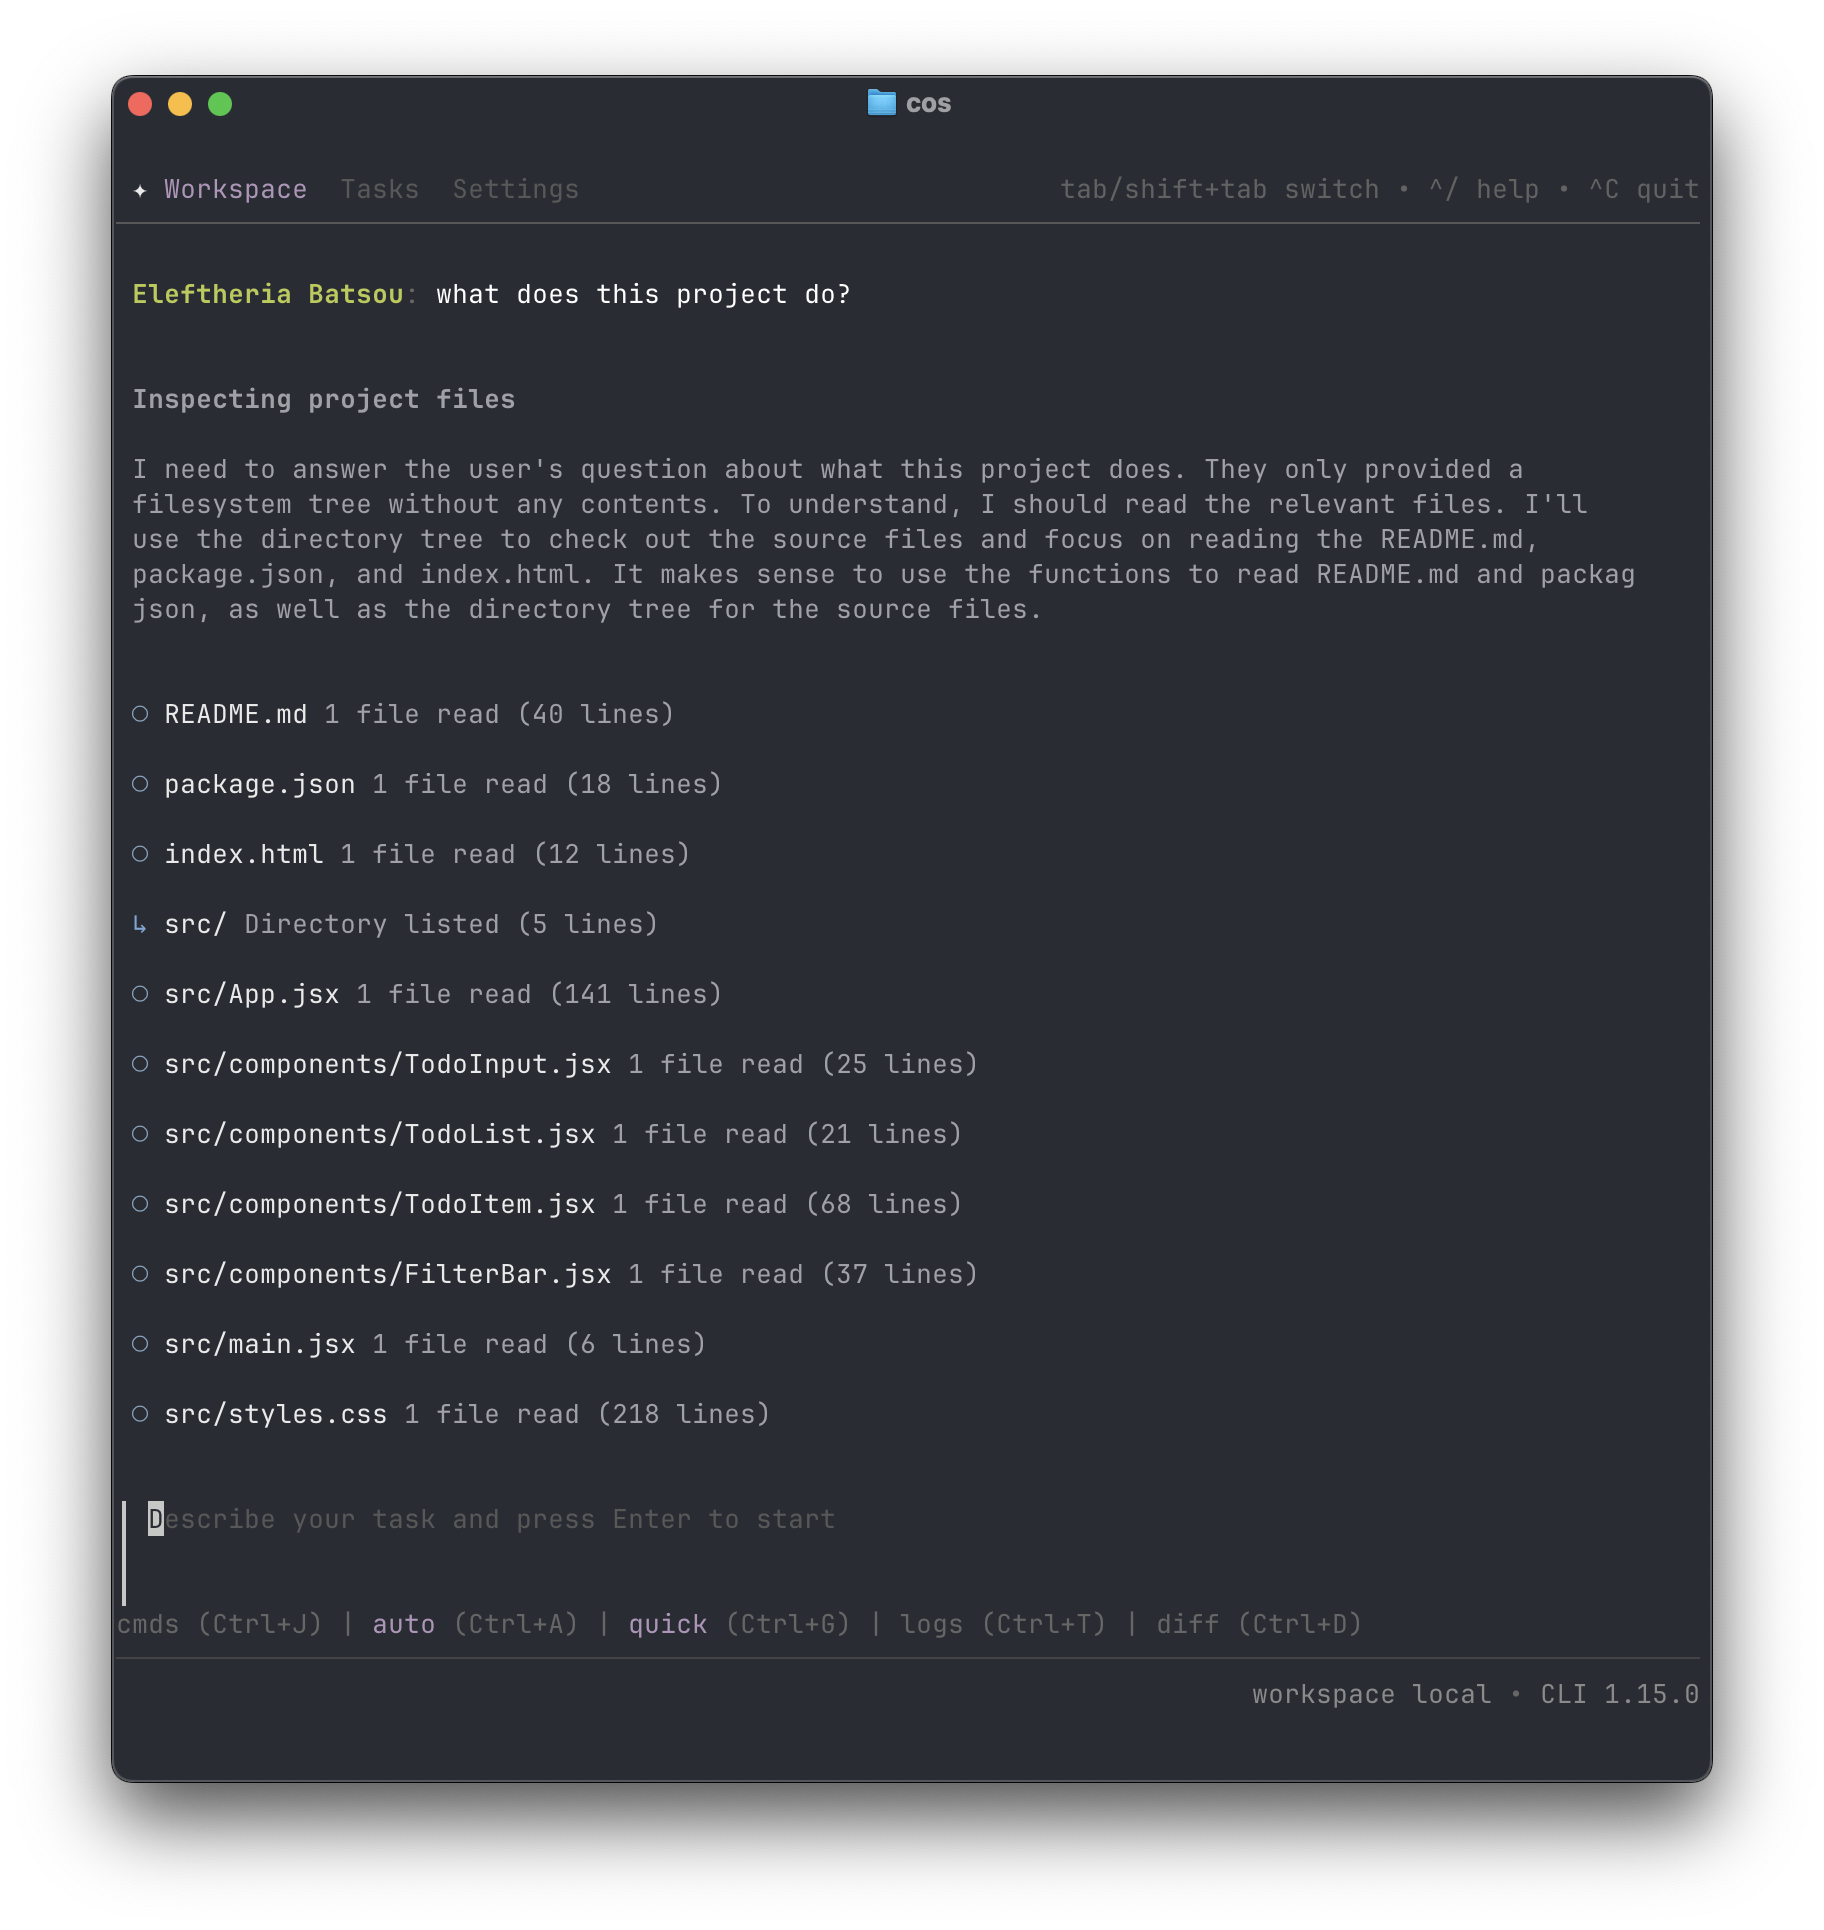
And just like that you have your first task. Feel free to ask it again or nudge it.
If you want more information about how to get started, you can also check this video:
Bonus: Settings Panel
By pressing Tab or Shift+Tab, you can move between Workspace, Tasks, and Settings tabs in the CLI.
In the Settings tab, you can:
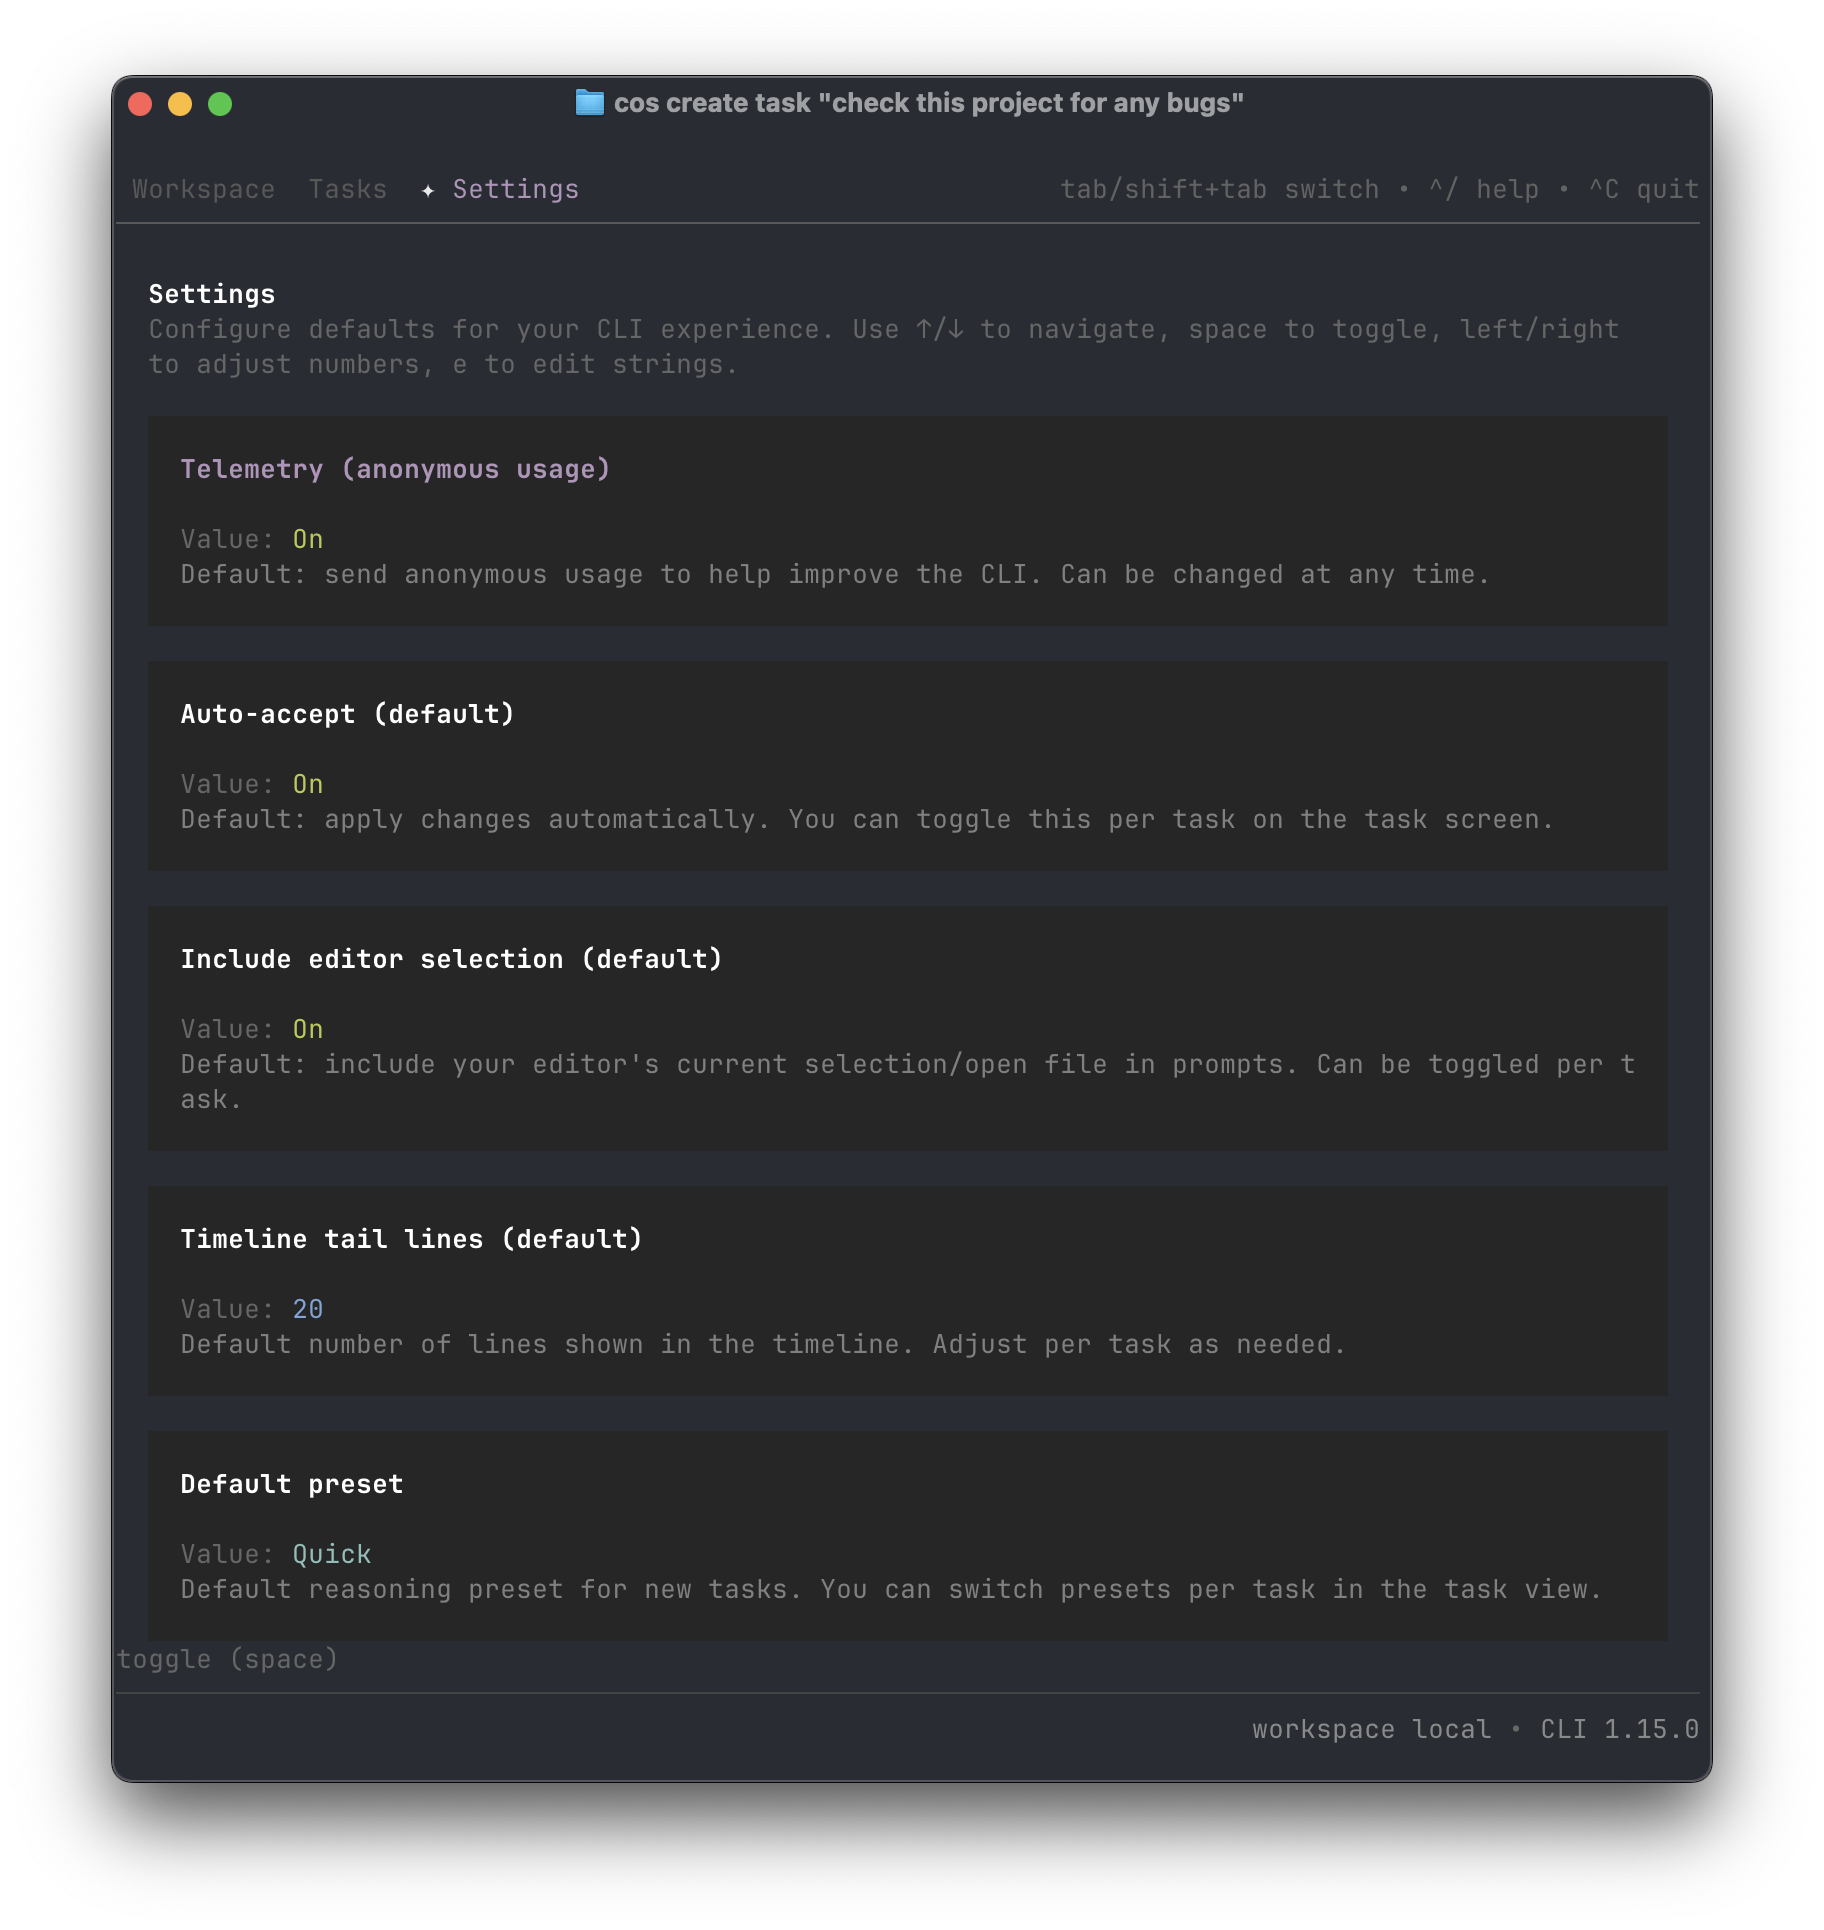
- Toggle telemetry (anonymous usage)
- Enable/disable auto-accepting changes
- Include your editor’s current selections/open file in prompts
- Set default context line counts for task timelines
- Choose your preferred task mode preset (e.g., “quick”)
Nudging via CLI
Recently, we added a feature to nudge the CLI. Nudging is incredibly useful when you want to:
- Clarify a vague task
- Add new constraints or acceptance criteria
- Keep Genie moving without restarting the task
You can learn more about it here.
Bonus: Cosine VS Code Extension
If you’re a VS Code user, you’ll love the Cosine extension that brings all the power of Genie directly into your editor. You can prompt, get inline feedback and code changes, stay in flow without context switching. Check out documentation here.
Watch me build my portfolio site using it:
When Should You Use the CLI?
Use the CLI if you:
- Prefer working from the terminal
- Need to work on local or private code
- Are scripting or chaining tasks in a dev workflow
- Want to stay in flow without switching tools
Use the web app if you:
- Want to visualize diffs, CI, or Vercel previews
- Are managing multiple team tasks
- Prefer a more guided UI experience
Note 1: The CLI and web platform share the same backend — your projects and tasks stay connected.
Note 2: The CLI is currently available on Max and Linux.
Final Thoughts
The CLI can easily become one of your favorite ways to work with Cosine. It feels natural, powerful, and flexible, like Genie is truly embedded in every developer’s local workflow. Whether you’re fixing bugs, testing changes, or automating your own scripts, the CLI makes Cosine feel like a real teammate.
Try it out by installing the CLI, linking your account, and creating your first task. You’ll be surprised at how quickly it fits into your daily rhythm. If you have questions, suggestions, or CLI tricks of your own, we’d love to hear them!